

Using GitHub Classroom for Software Development Instruction
David Singletary
Professor of Information Technology
Florida State College at Jacksonville
Managing programming assignments for large classes can be challenging: distributing starter code, tracking submissions, grading, and providing rapid feedback are all time-intensive tasks. GitHub Classroom offers a powerful solution that blends industry-standard tools with classroom workflow, allowing instructors to manage projects using the same platforms students will encounter in professional software development.
In this post, I’ll outline how GitHub Classroom works in practice, and why it has become a cornerstone of my teaching process.
Why GitHub Classroom?
GitHub Classroom creates a private workspace where students and instructors collaborate within the familiar GitHub ecosystem. Each course is organized as its own classroom, and instructors provide assignments using template repositories. Students join by accepting invitation links, which automatically generate private repositories for every learner.
This approach provides several key benefits:
- Students gain real-world experience using professional developer tools.
- Starter code can be distributed instantly and consistently.
- All submissions arrive as Git repositories; no email attachments or LMS uploads required.
- Instructors maintain clear version histories and can review work directly within GitHub.
- Student repositories remain private by default, maintaining academic integrity and privacy.
Setting Up GitHub Classroom
1. Join GitHub Education and Create an Organization
The process starts by applying for GitHub Education (https://docs.github.com/en/education/about-github-education/github-education-for-teachers/apply-to-github-education-as-a-teacher). Once verified, you can create an organization to host your classrooms. You can use a personal GitHub account for this, note that “organization” in this context is not a formal entity associated with your college.
In my workflow, I maintain one organization per course (individual course sections are all managed under the associated course organization) and use scripts to archive and delete student repositories from previous semesters, which keeps everything clean and easily navigable.
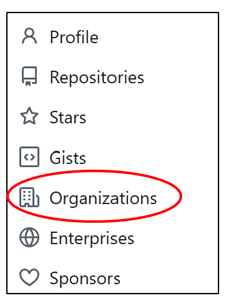
Organizations are created directly in GitHub via the “Organizations” menu:
followed by the “New Organization” button:
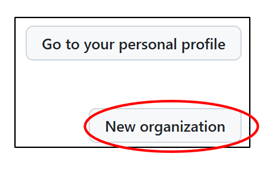
From here you create a free organization:

I give my organizations a meaningful and unique name, e.g., FSCJ-COP2800C is for the Java course I teach at FSCJ.
2. Create a Classroom
After creating an organization, log into GitHub Classroom at https://classroom.github.com and connect that organization to a new classroom by selecting the desired icon listed below this heading:
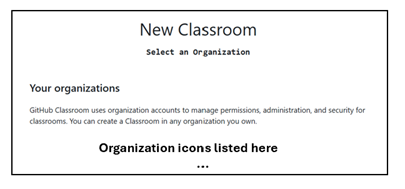
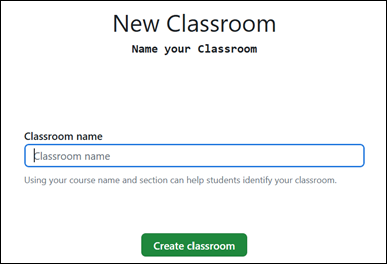
The system then prompts you to name the classroom (for example, “COP2800C Fall 2025”), after which it becomes the hub for assignments, student management, grading, and automation.
3. Adding Teaching Assistants and Students
- TAs or co-instructors can be invited as admins as the classroom is set up, or you can skip this step:
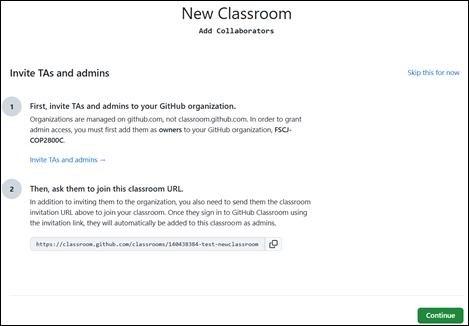
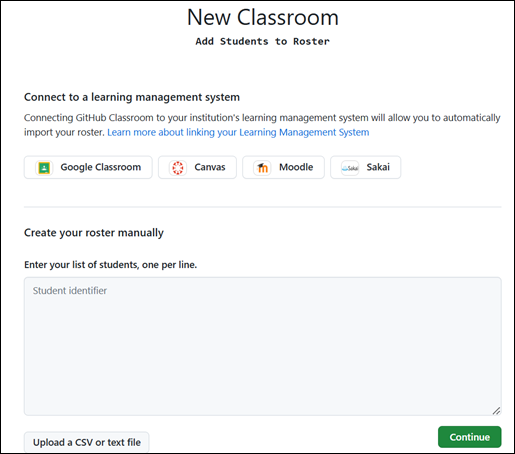
- Students can either be added manually here; this step can also be deferred. My students join the classroom by accepting assignment invitation links from Canvas.
Creating Assignments
Assignments in GitHub Classroom are created as private template repositories in your personal GitHub account under the applicable course organization. As private repos, access to the content is restricted to explicitly authorized users. Template repos are reusable project blueprints that allow users to generate new repositories with the same structure, files, and configuration without copying the commit history.
1. Prepare Starter Code
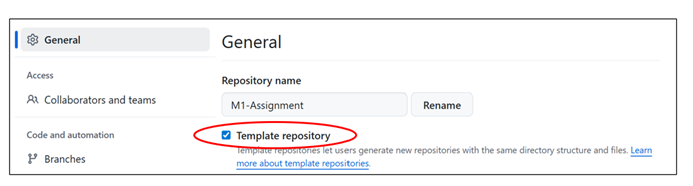
In the repository settings, enable the “Template repository” option, which allows GitHub Classroom to clone it automatically for every student. For instance, let’s say I want to create an assignment for Module 1 of a course. I create a new repo (which is private by default) named “M1 Assignment, then access the repo settings using the “gear” icon:

The Template repository option is currently found under the General settings category at the top of the page:
At this point you need to decide how to roll out your project, which is dependent on the assignment requirements. This template repo may include:
- Starter source files
- README.md file
- Scaffolding files
- Detailed instructions
- Example data files
- Build configurations
For my programming courses, I always include a README.md file that, at a minimum, lists the project name (GitHub will provide this as a default if you allow it), along with a PDF file containing detailed instructions. For freshman-level assignments, I sometimes provide a starter file (for example, “Calculator.java”) that includes “fill-in-the-blank” tasks expressed as descriptive comments. For more advanced students, requirements vary from empty projects—where students must supply all files—to fully built projects that require students to add new features. Files are either submitted using the web interface file upload feature (for simple projects) or using Git (for more complex projects).
2. Create the Classroom Assignment
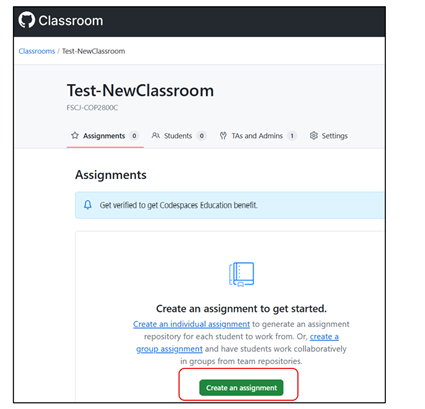
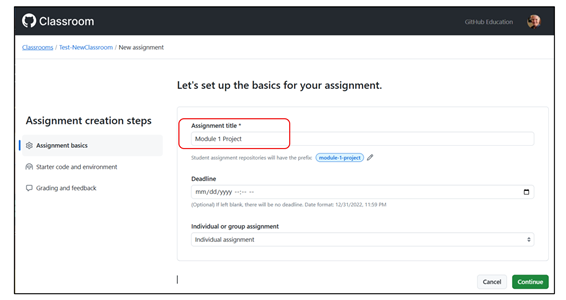
Within the GitHub Classroom interface, select “Create an assignment” and supply the template repository as the starter code source. In the image below I have created a GitHub Classroom called “Test-NewClassroom” under the FSCJ-COP2800C organization.
The basics include setting the name of the assignment, you can also provide deadlines and specify individual or group assignments (I usually leave these blank and control them with the LMS). Here I’ve titled my assignment “Module 1 Project”. This can be the same as the repository name, but it isn’t required.
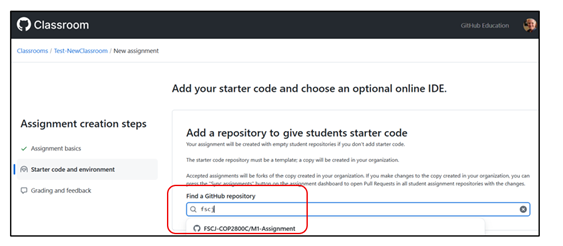
At this point you can add the associated repository for the assignment. The interface includes an auto-complete feature which makes it easier to specify the project (which must include the organization name and the repo). You can see the auto-complete option displaying my test assignment, I simply click on it to add it.
Once the organization and assignment repo are entered, you can just accept the defaults and continue.

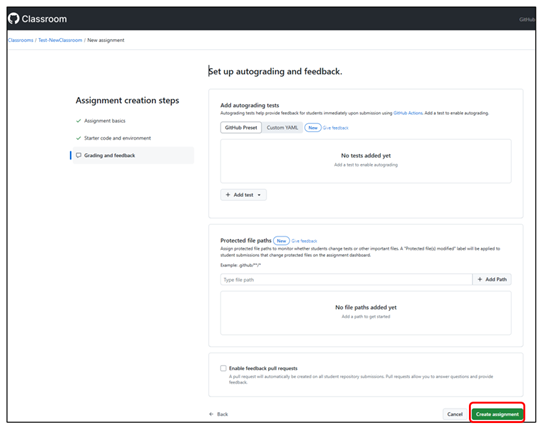
I’m now ready to complete the final step to create the assignment. I could configure autograding and feedback here, but as I mention below, this is a more complex process that I will cover in a future post.
Once the assignment is created, the tool generates a unique invitation link that you can copy:
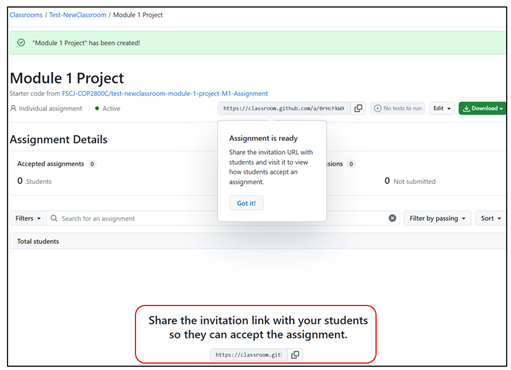
3. Distribute the Link
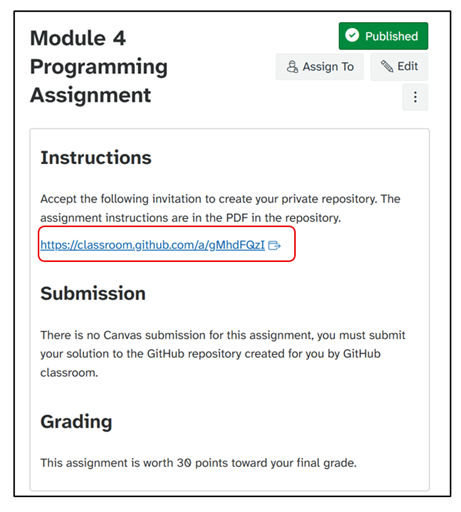
The invitation link can be pasted directly into Canvas or any LMS. Students click the link, authenticate with GitHub, and their personal assignment repository is forked instantly; no manual setup is required. Depending on the project requirements, students can then submit their work directly to the repo using the file upload feature of GitHub’s web interface or use Git to clone the repo and then commit their work. For the first assignment in lower-level courses, I usually include a recorded walkthrough of completing the assignment. For subsequent assignments the instructions are minimal since everything is included in the repo that the students will fork/clone. Here’s an example of an assignment in Canvas where I have pasted the GitHub Classroom invite link. For these assignments I configure Canvas to not accept any attached submissions, the students must submit to the repo.
Grading Student Work
GitHub Classroom simplifies grading by consolidating all submissions in one place.
1. Viewing Submissions
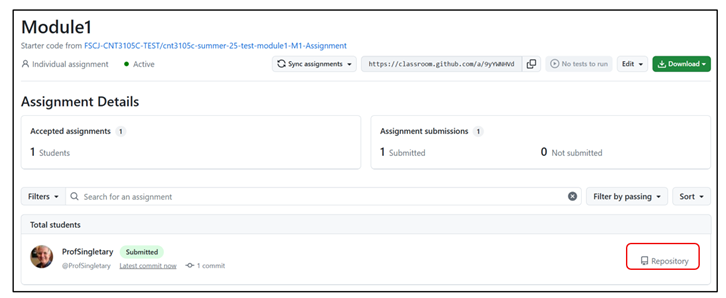
From the classroom dashboard, select the assignment and use the “Repository” link to navigate into any student’s repository. This allows for:
- Review of code files online
- Viewing commit histories
- Commenting on pull requests if peer review is used

2. Accessing Files
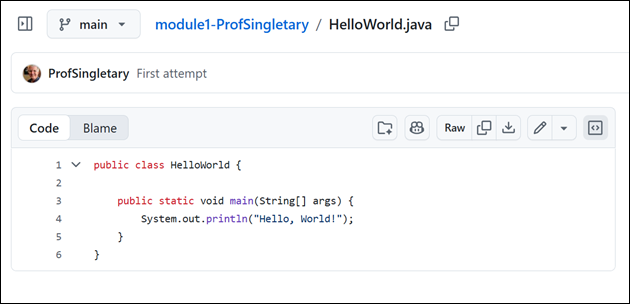
Many file types are directly rendered by GitHub; this allows me to do a lot of grading without having to download anything. (some proprietary formats, such as .docx for Word documents, must be downloaded as “raw files”). Here’s an example of a basic Java application as rendered by GitHub:
I typically require screenshots of students’ work to be submitted which includes output; these .png or .jpg files can also be viewed directly in the repo.
Automated Grading with GitHub Actions
GitHub Classroom supports auto-grading by integrating GitHub Actions to automatically build, run tests, and evaluate student submissions each time code is pushed. This provides consistent, repeatable feedback and reduces manual grading overhead while exposing students to industry-standard CI workflows. I will provide step-by-step instructions for setting up and using auto-grading with GitHub Classroom in a future blog post.
Final Thoughts
GitHub Classroom helps bridge education and professional practices. It provides the structure needed for classroom workflows while maintaining the authenticity of real-world development environments. Whether you teach introductory programming or advanced software courses, incorporating GitHub Classroom:
- Streamlines the assignment process, saving you time
- Enhances learning through responsive feedback
- Helps prepare students for the tools and workflows they’ll use on the job